

Developer tutorial. Requires Node.js, React, TypeScript, and command-line experience.
What you’ll build
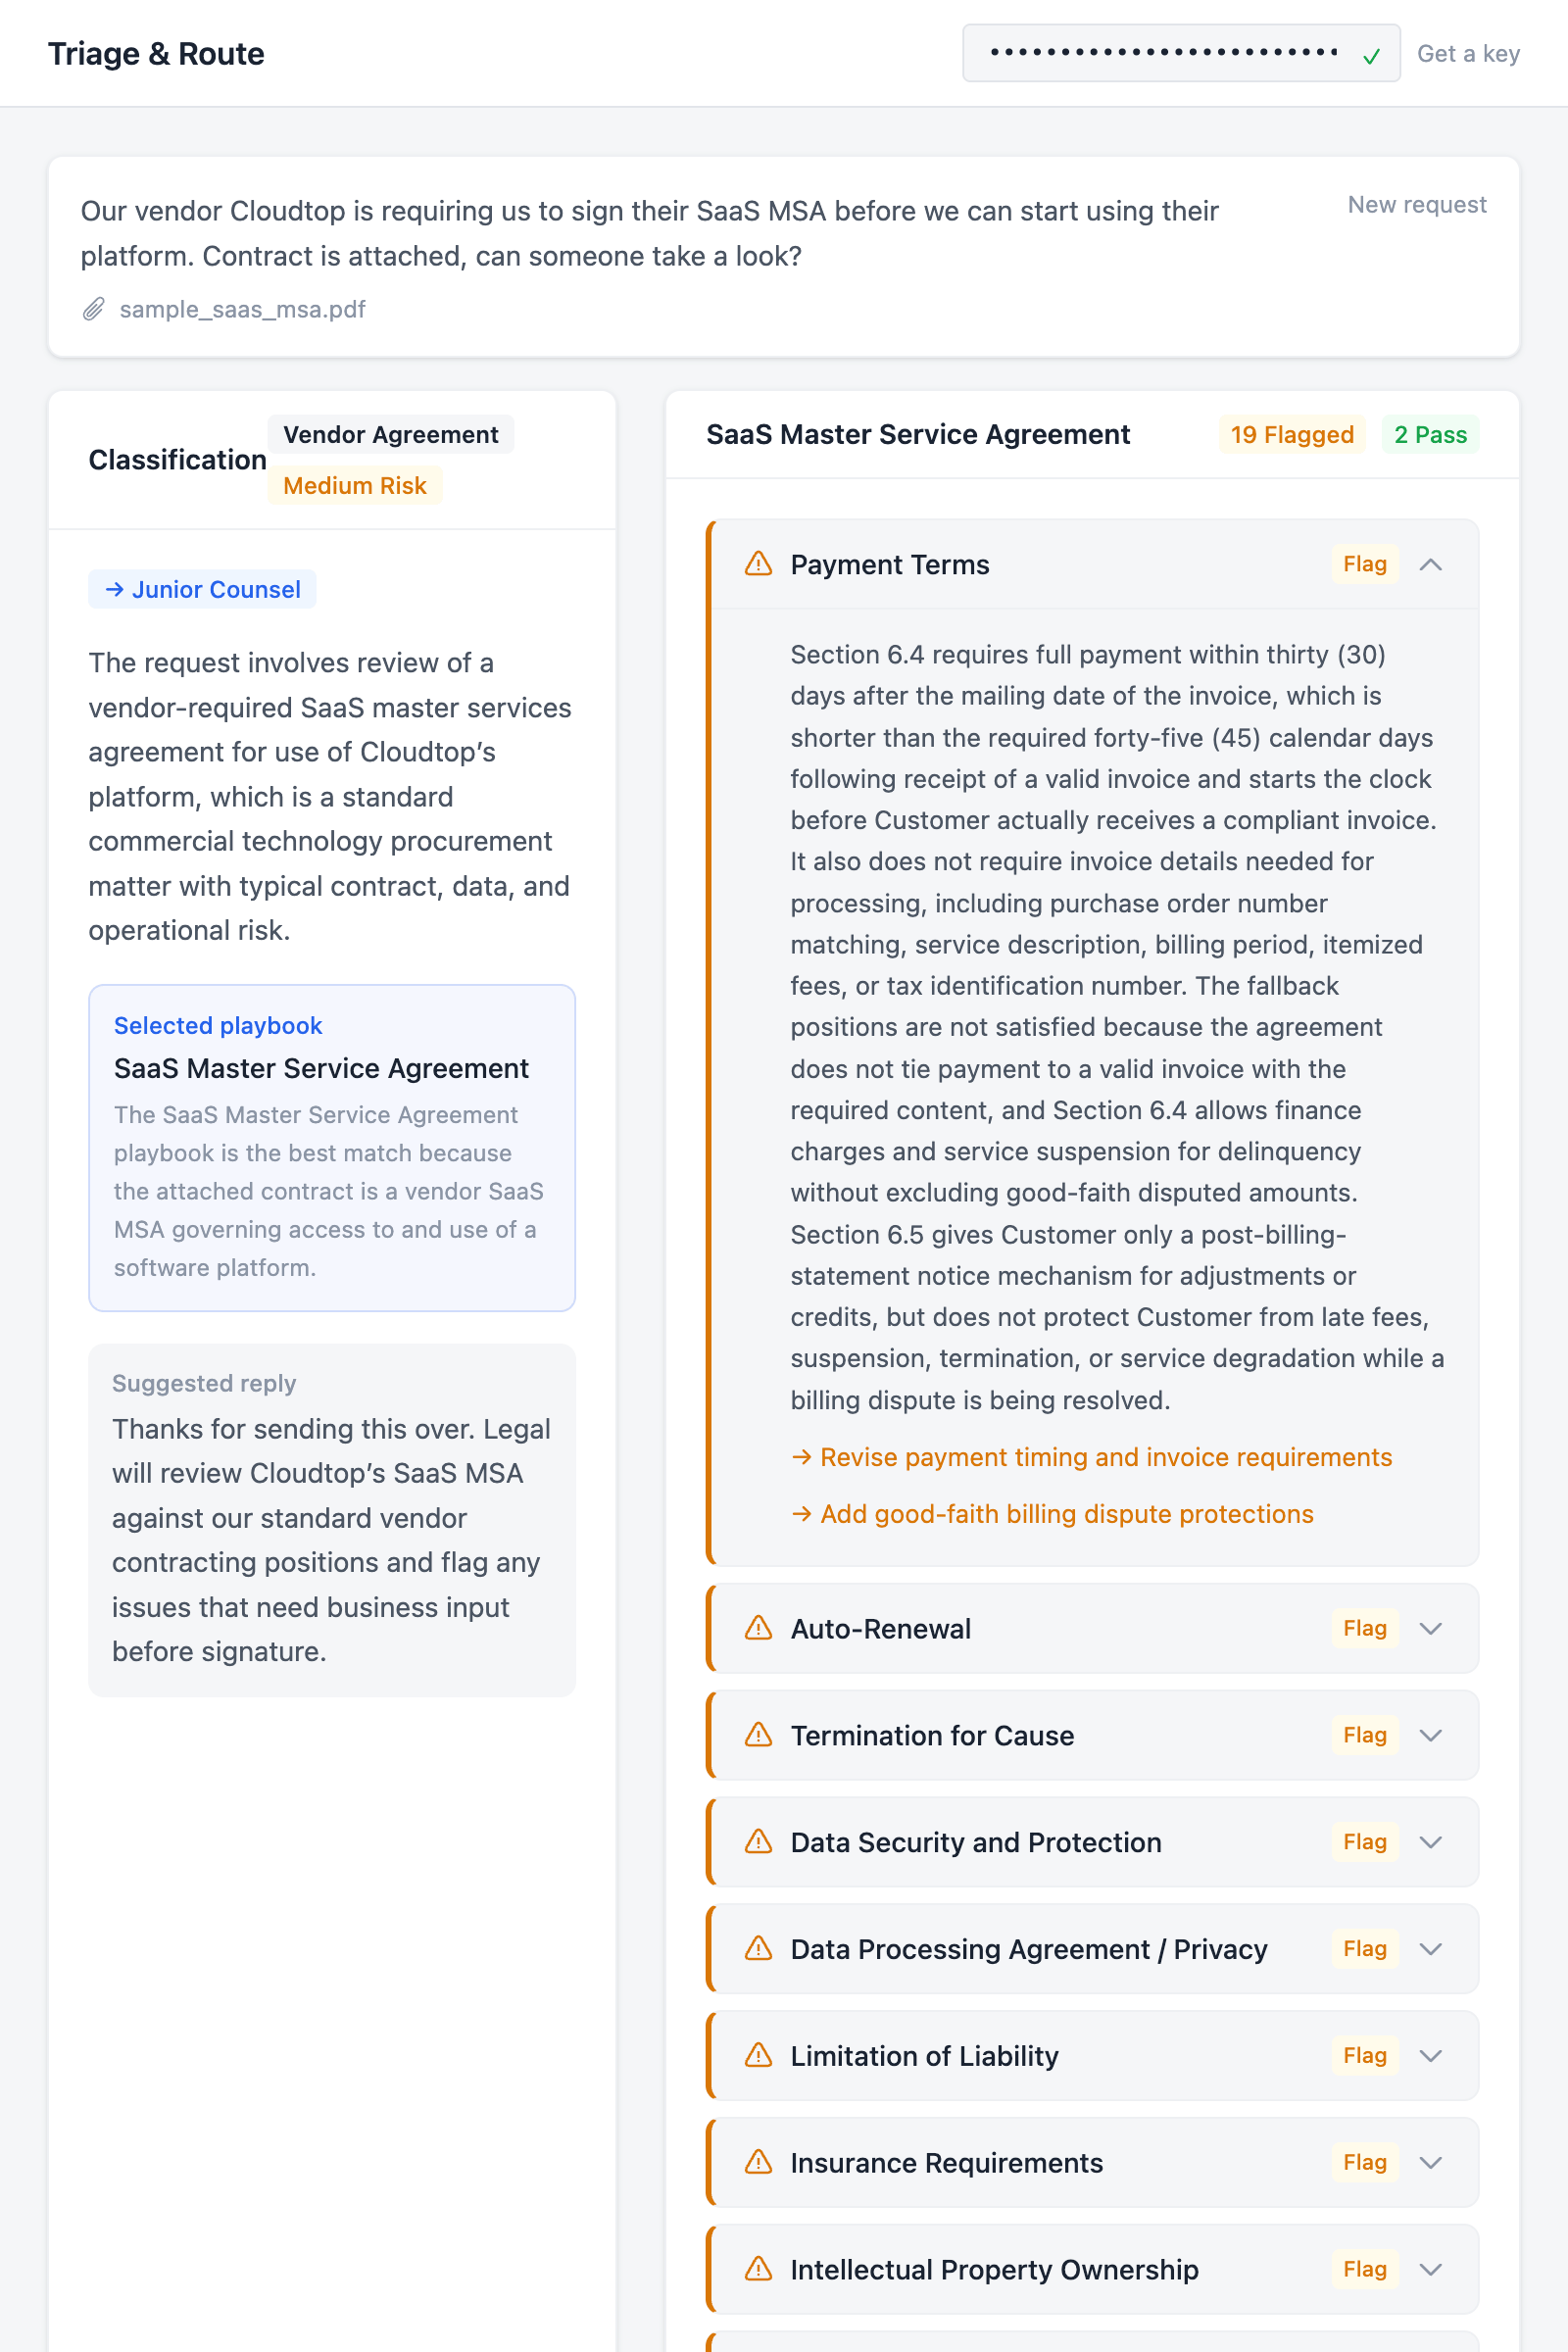
A two-panel webapp where a user describes a legal request, attaches a contract, and clicks “Triage Request.” The app classifies the request (category, risk level, routing lane), selects the most relevant playbook from the user’s GC AI account, and runs that playbook against the document. The left panel shows the classification. The right panel shows every playbook check with pass/flag results and suggested revisions.API endpoints
Want to skip ahead? Try the live demo or view the source on GitHub.
Prerequisites
- A GC AI API key (get one from Settings > API in the app)
- At least one completed playbook in your GC AI account
- Node.js 18+
Build the app
1
Scaffold the project
Create a new Vite + React + TypeScript project and install Tailwind CSS:Open The proxy forwards Replace Create two empty files. These are the only two source files we’ll write:Run
vite.config.ts and add the Tailwind plugin plus an API proxy for development:vite.config.ts
/api requests to GC AI during development so you don’t hit CORS issues from localhost.Clear out the starter code and set up the theme:src/index.css with the Tailwind import and a color theme that covers classification badges, routing lanes, and check statuses:src/index.css
npm run dev to confirm the scaffold works before we start building.2
Build the API client
The API client goes in Next, a small helper that attaches the API key to every request and throws on non-2xx responses:Key validation and playbook listing. File upload. Same pattern as the heatmap demo: post the file, then poll until it’s ready:Request classification. This is the first novel piece. The prompt includes the list of playbooks so the model can pick the best match. It returns category, risk, routing lane, and the selected playbook ID:Playbook run. The second novel piece. Instead of crafting our own review prompt, we call the real playbook API. It runs every check the playbook defines and returns structured results:That’s the whole API layer. Five exported functions:
src/api.ts. It wraps the GC AI endpoints into five functions: validateApiKey, listPlaybooks, uploadFile, classifyRequest, and runPlaybook.Start with the types. This demo has two main shapes: Classification (from the AI) and PlaybookRunResult (from the playbook API):src/api.ts
src/api.ts
validateApiKey checks the key with a lightweight folders call. listPlaybooks fetches all completed playbooks from the user’s account:src/api.ts
src/api.ts
src/api.ts
src/api.ts
validateApiKey, listPlaybooks, uploadFile, classifyRequest, and runPlaybook. The playbook polling uses a 3-second interval and longer timeout since playbook runs with many checks can take a few minutes.3
App shell: header, key validation, and playbook loading
Now we start building When the key validates, 
src/App.tsx. This first pass sets up the header with the API key input, loads playbooks once the key validates, and adds the footer. The layout is wider than the heatmap demo (max-w-5xl instead of max-w-3xl) because we’ll use a two-column layout for results.src/App.tsx
listPlaybooks runs in the background. The playbooks are stored in state so the classification prompt can include them later. You won’t see them in the UI yet.4
Request form
Add a Also add a 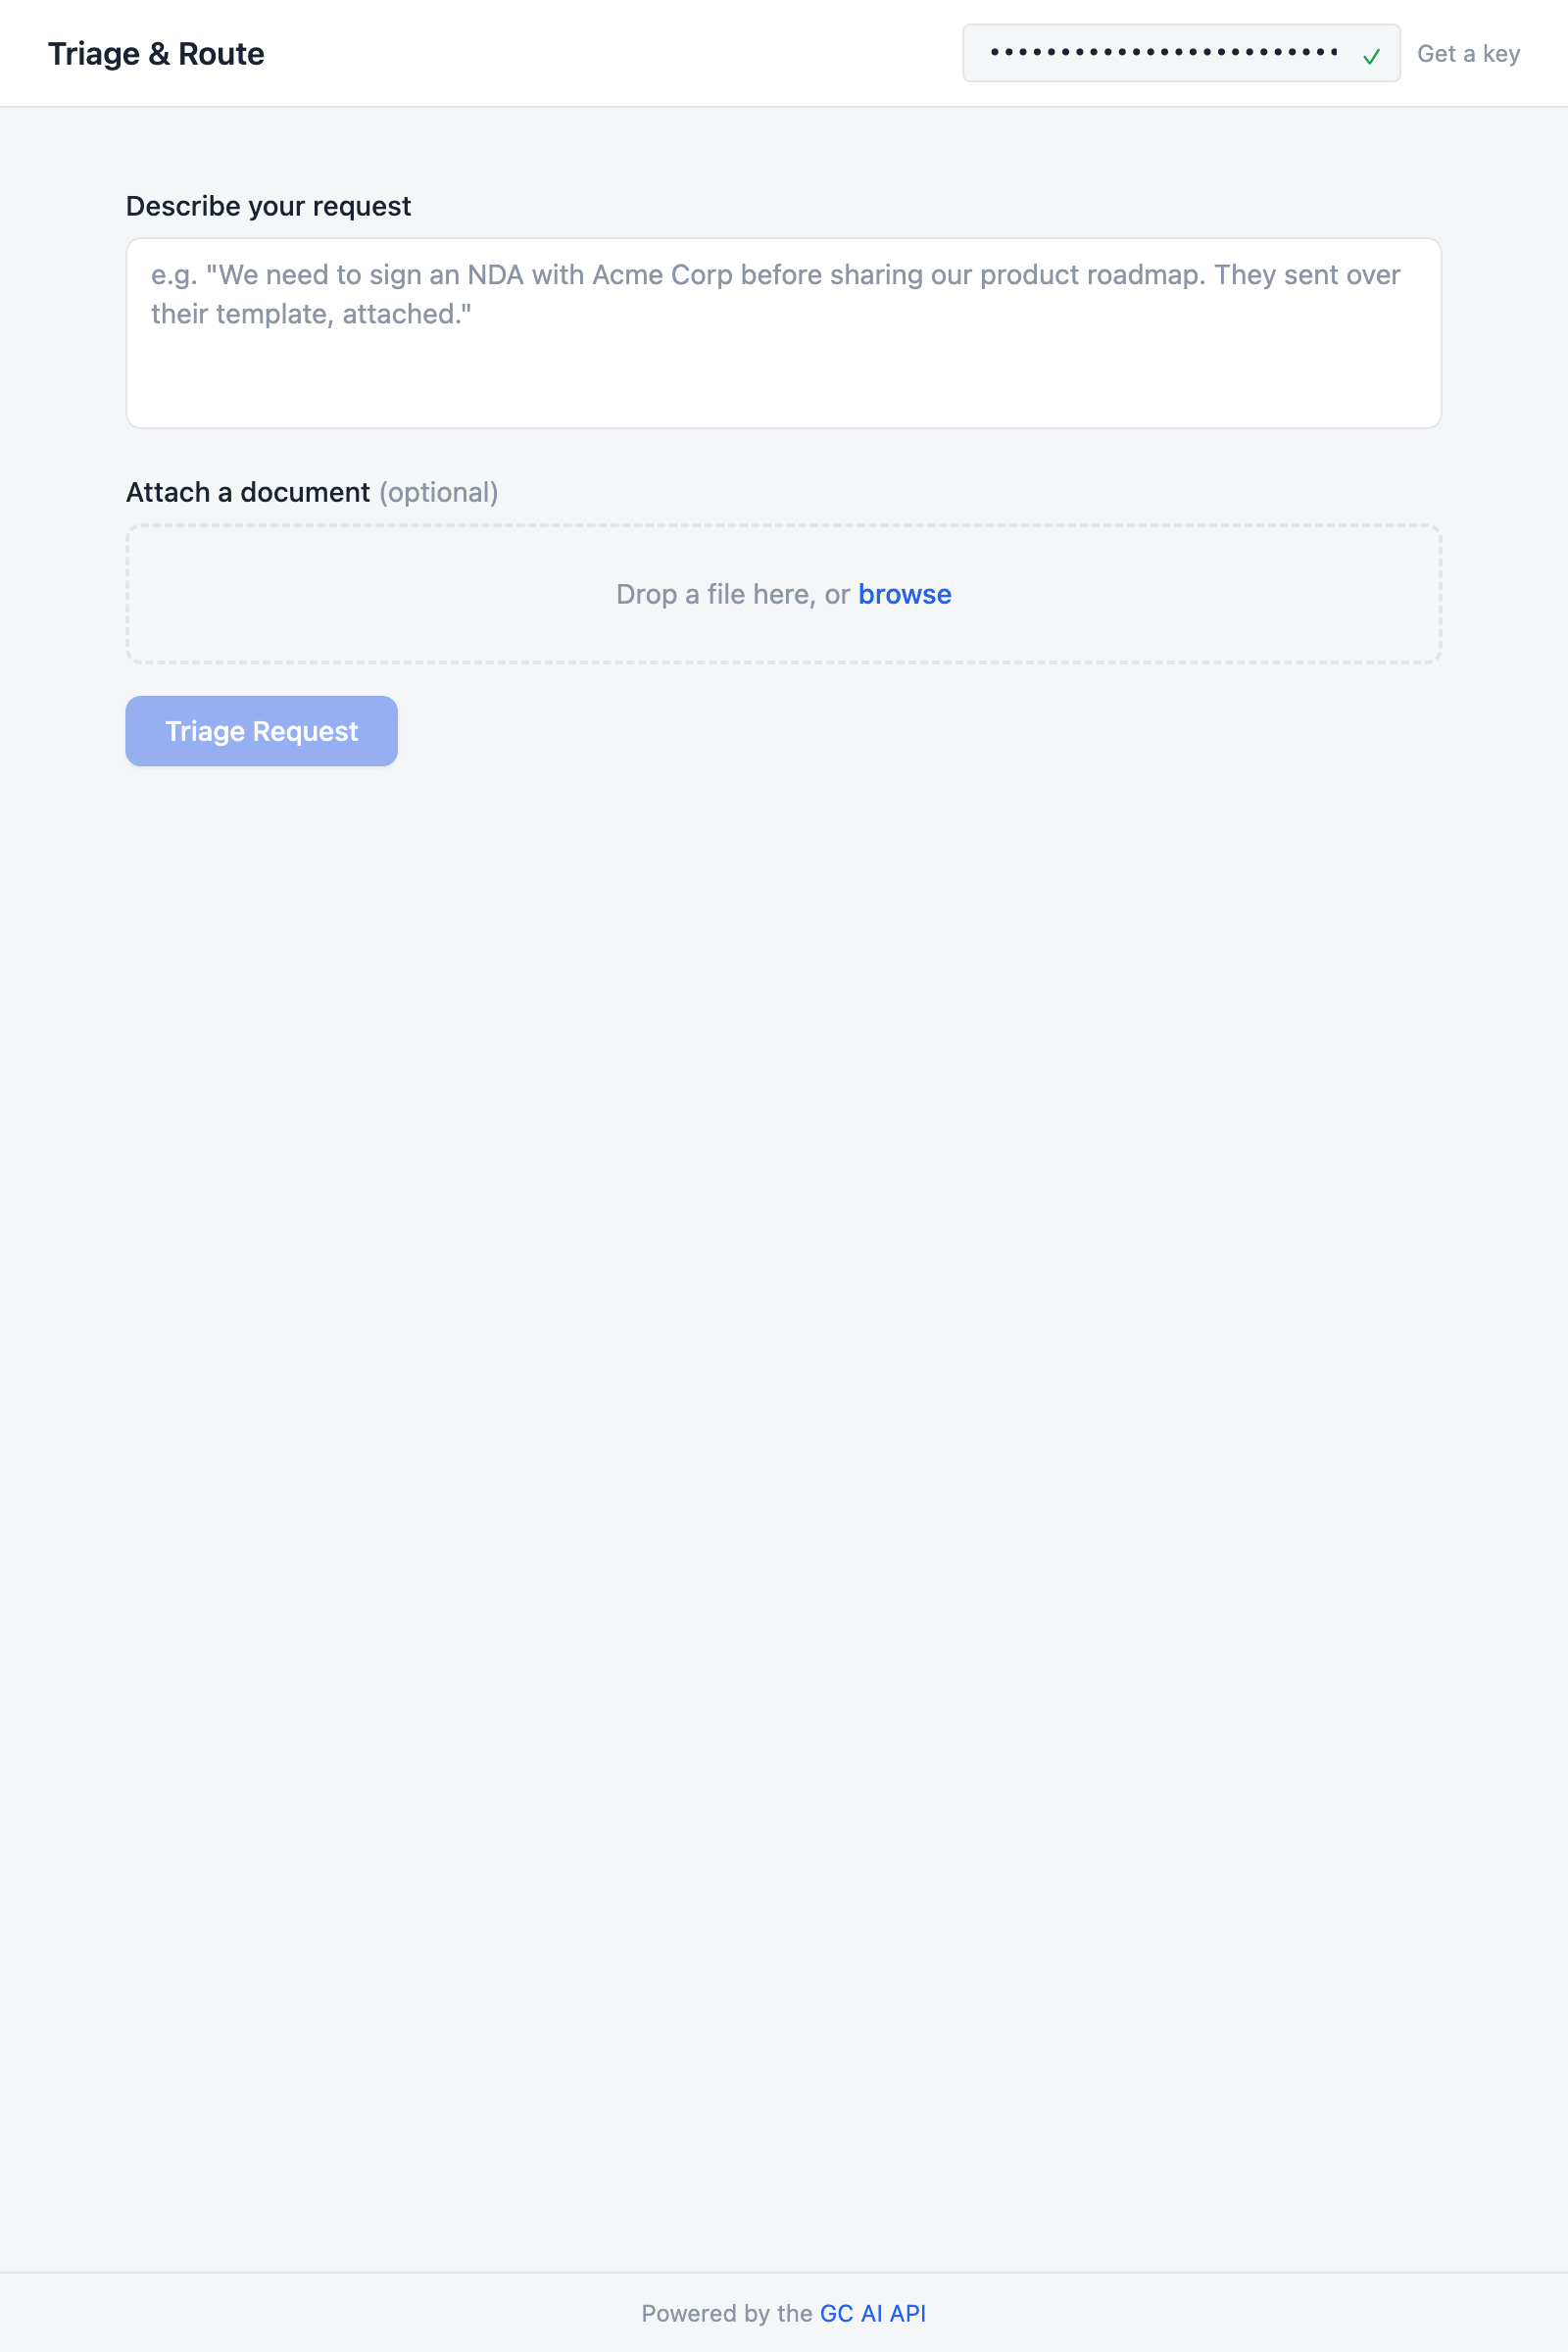
RequestForm component above the App function. It has a text area for describing the request and an optional file upload:src/App.tsx (above App)
RequestSummary component that displays the submitted request after the form is replaced:src/App.tsx (above App)
5
Classification panel
Add the classification panel that displays on the left side of the results. It shows the category, risk level, routing lane, the selected playbook, and a suggested reply:The category and risk badges sit in the panel’s header bar. The routing lane, rationale, selected playbook, and suggested reply fill the body. The “Selected playbook” block has a distinct accent-colored border so it stands out as the routing decision.
src/App.tsx (above App)
6
Playbook results panel
Add the playbook panel that displays on the right side. Each check is collapsible, showing just the title and Pass/Flag badge until clicked. The analysis text is cleaned to strip internal citation tags:
src/App.tsx (above App)
cleanText strips <cite id="..."/> tags and ** bold markers that the playbook system uses internally for citations and emphasis. These are useful in the product UI but would look like raw markup in our demo.7
Wire it up
The last piece is the state machine and the three-section layout that brings everything together.Define the status type above the Each step carries everything the UI needs. The The handler runs four steps in sequence: classify, upload, run playbook, done. If there’s no file or no matching playbook, it short-circuits to done after classification.Finally, fill in the Run
App function:src/App.tsx (above App)
request context travels through every state so the summary bar always has it. The classification appears once classification finishes and stays visible through upload and review.Add the state, handler, and derived values inside App:<main> element. The layout has three sections: the request summary on top, then a two-column grid with classification on the left and playbook results on the right:npm run dev, paste your API key, describe a request like “Our vendor Cloudtop is requiring us to sign their SaaS MSA, contract attached,” upload the PDF, and click Triage Request. The classification should appear in a few seconds on the left. The playbook results fill in on the right once the review finishes, which can take a few minutes for playbooks with many checks.Try it and explore the source
Try it live
A hosted version. Paste your own GC AI API key to use it.
View source
The full project on GitHub.
Run it yourself
Import it into your own Replit in a few clicks. See Running on Replit.