Developer tutorial — requires Node.js, React, TypeScript, and command-line experience.
Upload a contract and get back a severity-ranked list of risky clauses with suggested redlines, all in a single-page React app that talks to the GC AI API.
Contract Risk Heatmap app showing a PDF preview and identified risks sorted by severity with category badges, clause references, and suggested redlines

What you’ll build

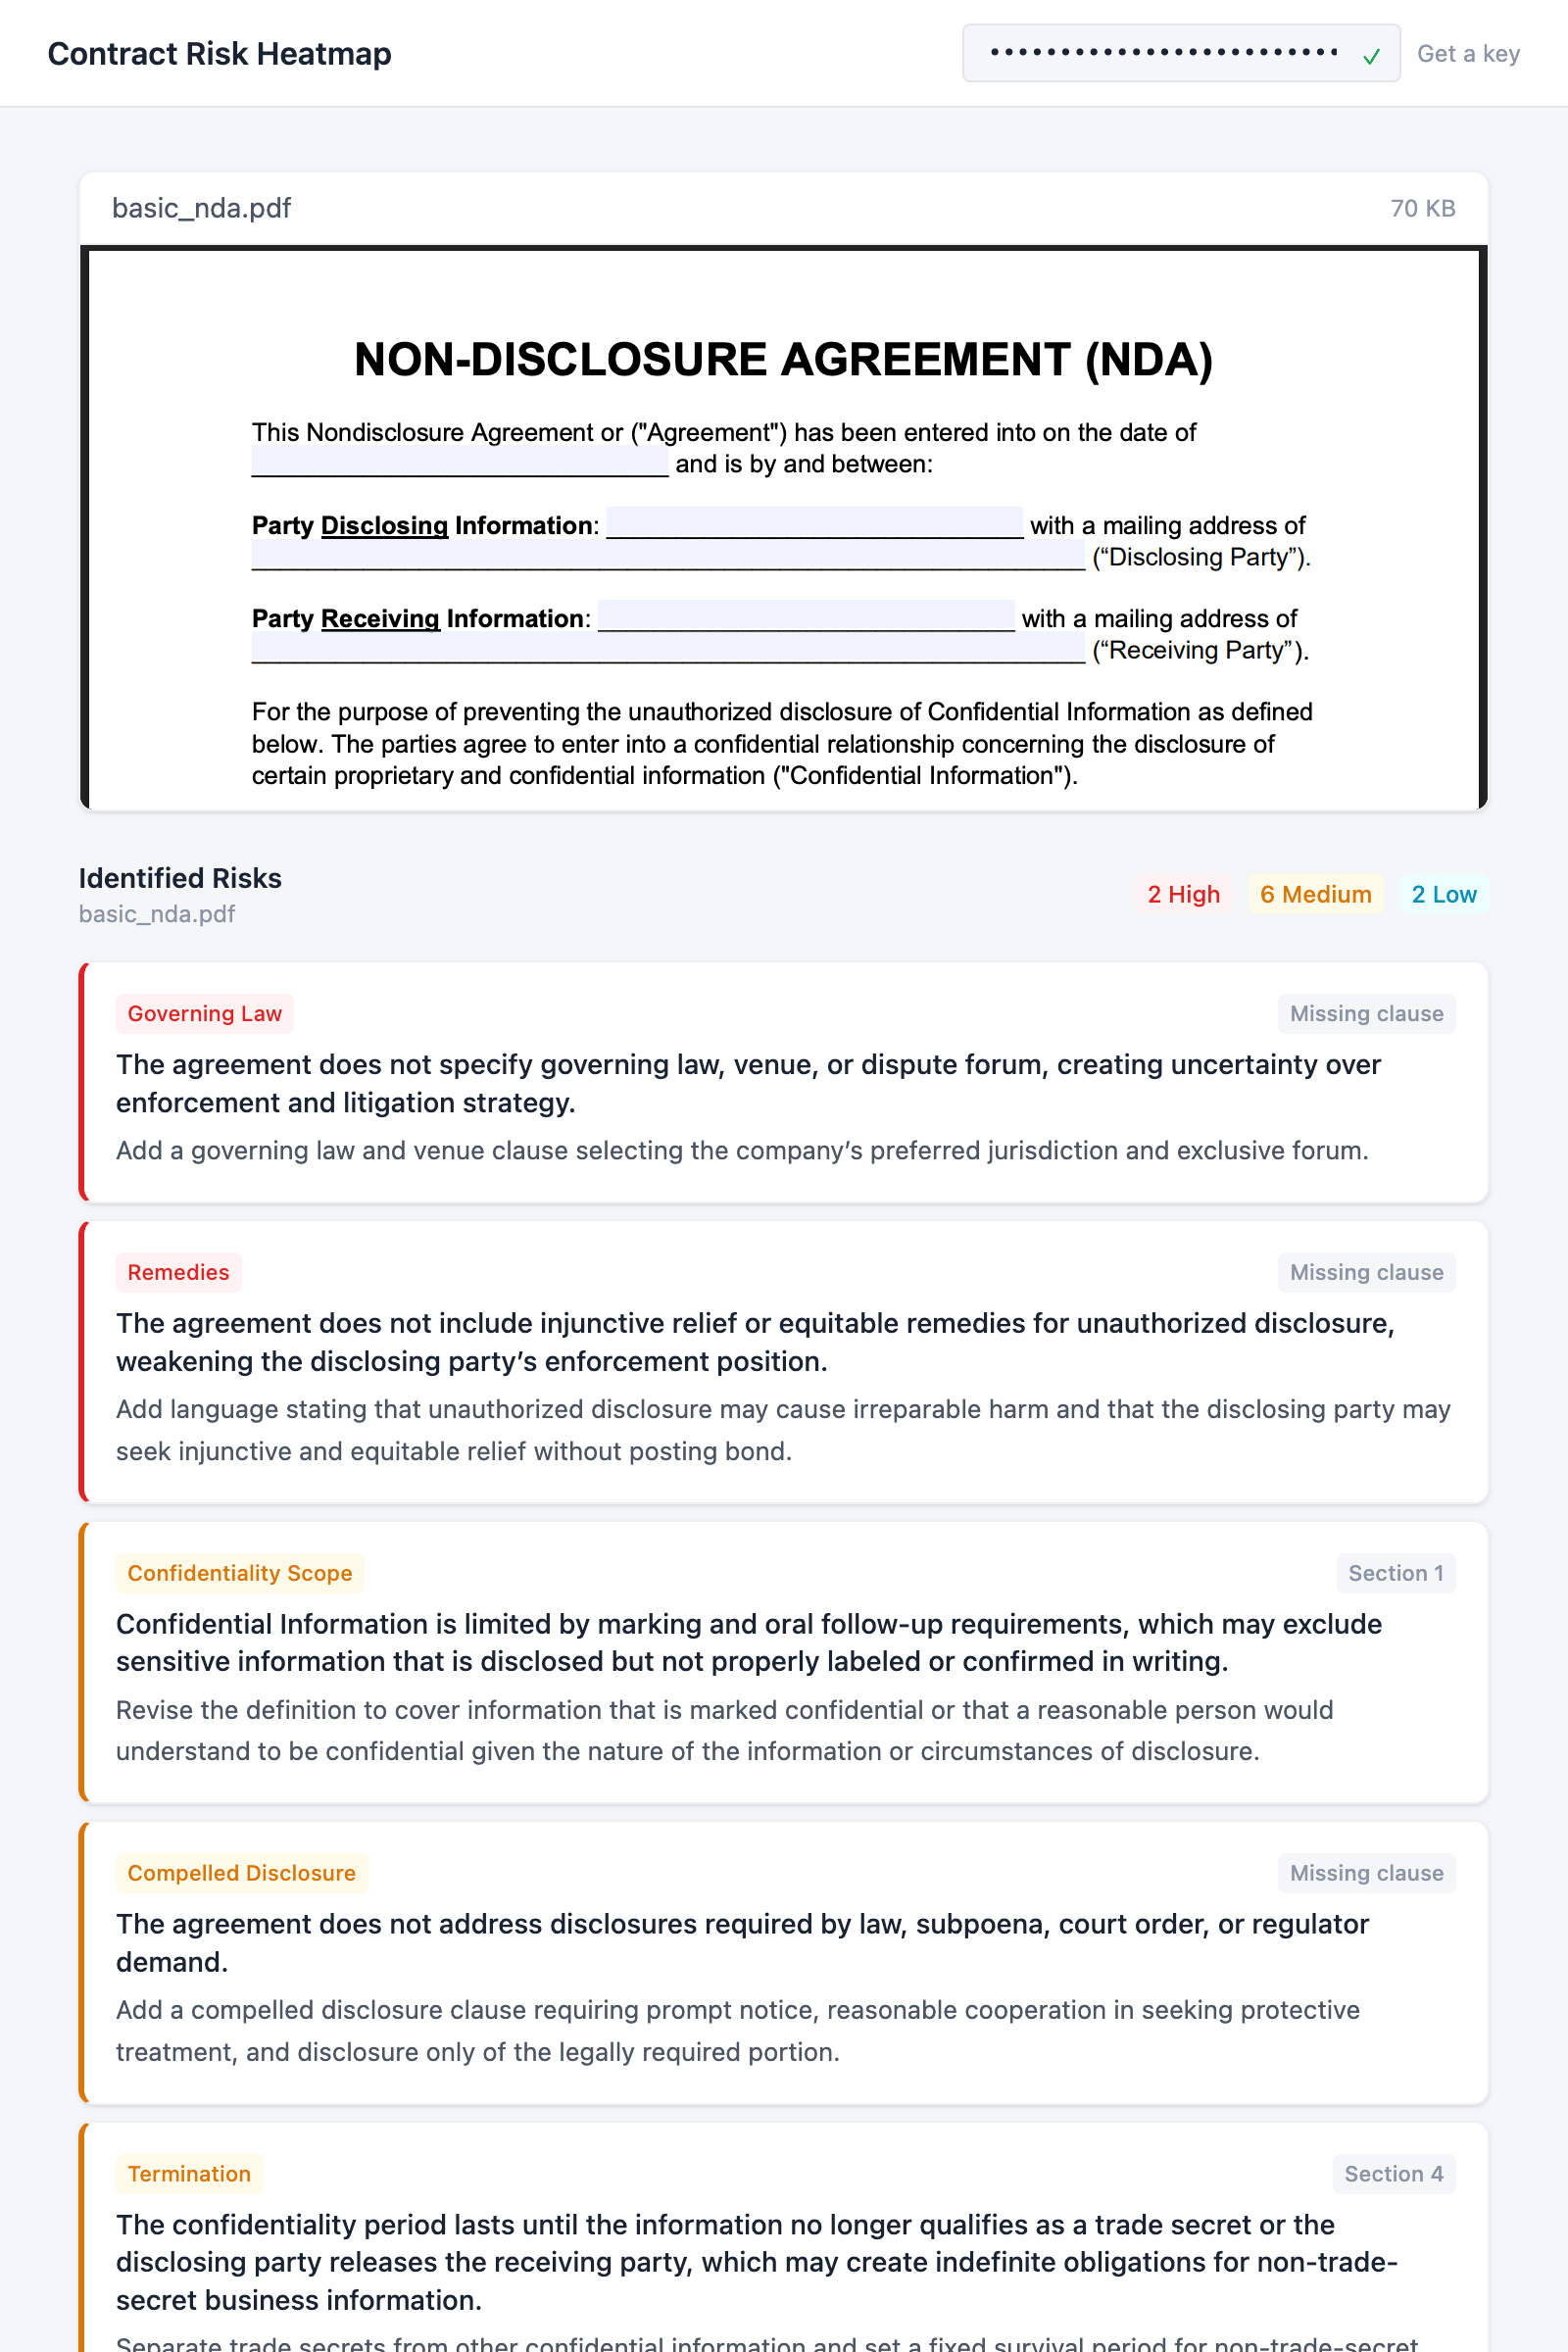
A drag-and-drop webapp where a user pastes their API key, uploads a PDF contract, and sees a heatmap of risks sorted by severity. Each risk includes a clause reference, category, and suggested redline. The whole thing runs on two API calls: one to upload the file, one to analyze it.

API endpoints

MethodEndpointWhat it does
GET/v1/foldersValidates the API key on paste
POST/v1/filesUploads the contract
GET/v1/files/:idPolls until the file is processed
POST/v1/chat/completionsSends the analysis prompt (async, wait=0)
GET/v1/jobs/:idPolls until the analysis is complete
Want to skip ahead? View on GitHub or run on Replit.

Prerequisites

Build the app

1

Scaffold the project

Create a new Vite + React + TypeScript project and install Tailwind CSS:
npm create vite@latest api-demo-heatmap -- --template react-ts
cd api-demo-heatmap
npm install tailwindcss @tailwindcss/vite react-pdf
npm install
Open vite.config.ts and add the Tailwind plugin plus an API proxy for development:
vite.config.ts
import { defineConfig } from "vite";
import react from "@vitejs/plugin-react";
import tailwindcss from "@tailwindcss/vite";

export default defineConfig({
  plugins: [react(), tailwindcss()],
  server: {
    proxy: {
      "/api": {
        target: "https://app.gc.ai",
        changeOrigin: true,
      },
    },
  },
});
The proxy forwards /api requests to GC AI during development so you don’t hit CORS issues from localhost.Now clear out the starter code. We’ll write everything from scratch:
rm src/App.css src/assets -rf
Replace src/index.css with the Tailwind import and a minimal color theme:
src/index.css
@import "tailwindcss";

@theme {
  --color-surface: #f5f6f8;
  --color-card: #ffffff;
  --color-border: #e2e5ea;
  --color-border-light: #eef0f3;
  --color-ink: #1a2332;
  --color-ink-secondary: #4b5563;
  --color-ink-muted: #8b95a5;
  --color-accent: #2563eb;
  --color-severity-high: #dc2626;
  --color-severity-high-bg: #fef2f2;
  --color-severity-medium: #d97706;
  --color-severity-medium-bg: #fffbeb;
  --color-severity-low: #0891b2;
  --color-severity-low-bg: #ecfeff;
  --color-success: #16a34a;
  --color-error: #dc2626;
  --color-error-bg: #fef2f2;
}
Create two empty files. These are the only two source files we’ll write:
echo '' > src/api.ts
echo 'export default function App() { return <div>hello</div> }' > src/App.tsx
Run npm run dev to confirm the scaffold works before we start building.
2

Build the API client

The API client goes in src/api.ts. It wraps the GC AI endpoints into three functions: validateApiKey, uploadFile, and analyzeContract.Start with the types. ContractRisk is the shape we’ll ask the model to return:
src/api.ts
export interface ContractRisk {
  severity: "high" | "medium" | "low";
  category: string;
  clause: string;
  issue: string;
  redline: string;
}

interface FileResponse {
  id: string;
  name: string;
  status: "pending" | "processing" | "ready" | "failed";
}

interface JobResponse<T> {
  job_id: string;
  kind: string;
  status: "pending" | "running" | "succeeded" | "failed" | "canceled";
  result: T | null;
  error: { code: string; message: string } | null;
  created_at: string;
  completed_at: string | null;
}

interface ChatResult {
  result: string;
  chat_id: string;
}
Next, a small helper that attaches the API key to every request and throws on non-2xx responses:
src/api.ts
const API_BASE = "/api/external/v1";

async function apiRequest(
  apiKey: string,
  path: string,
  options: RequestInit = {},
): Promise<Response> {
  const res = await fetch(`${API_BASE}${path}`, {
    ...options,
    headers: {
      Authorization: apiKey,
      ...options.headers,
    },
  });
  if (!res.ok) {
    const body = await res.json().catch(() => ({}));
    throw new Error(
      (body as { error?: string }).error ??
        `API error ${res.status}: ${res.statusText}`,
    );
  }
  return res;
}
Key validation. A lightweight GET /folders?limit=1 call checks whether the API key is valid without creating any resources:
src/api.ts
export async function validateApiKey(apiKey: string): Promise<boolean> {
  try {
    const res = await fetch(`${API_BASE}/folders?limit=1`, {
      headers: { Authorization: apiKey },
    });
    return res.ok;
  } catch {
    return false;
  }
}
File upload. uploadFile posts the file, then polls GET /files/:id every 2 seconds until the status is ready. The caller just awaits the result:
src/api.ts
export async function uploadFile(
  apiKey: string,
  file: File,
): Promise<FileResponse> {
  const form = new FormData();
  form.append("file", file);
  const res = await fetch(`${API_BASE}/files`, {
    method: "POST",
    headers: { Authorization: apiKey },
    body: form,
  });
  if (!res.ok) {
    const body = await res.json().catch(() => ({}));
    throw new Error(
      (body as { error?: string }).error ??
        `Upload failed: ${res.status} ${res.statusText}`,
    );
  }
  const uploaded: FileResponse = await res.json();
  return waitForFile(apiKey, uploaded.id);
}

async function waitForFile(
  apiKey: string,
  fileId: string,
): Promise<FileResponse> {
  for (let i = 0; i < 60; i++) {
    const res = await apiRequest(apiKey, `/files/${fileId}`);
    const file: FileResponse = await res.json();
    if (file.status === "ready") return file;
    if (file.status === "failed") throw new Error("File processing failed");
    await new Promise((r) => setTimeout(r, 2000));
  }
  throw new Error("Timed out waiting for file processing");
}
Contract analysis. analyzeContract sends a chat completion with wait=0, which returns a job ID immediately instead of blocking. It polls the job until the model finishes, then parses the structured JSON out of the response:
src/api.ts
const ANALYSIS_PROMPT = `Analyze this contract for legal risks. Return a JSON array of risk objects.

Each risk object must have exactly these fields:
- "severity": "high", "medium", or "low"
- "category": a short label (e.g. "Liability", "Termination", "IP", "Data Privacy", "Indemnification")
- "clause": the section or clause reference (e.g. "Section 7.1", "Clause 4(b)")
- "issue": a one-sentence description of the risk
- "redline": a one-sentence suggested revision

Return ONLY the JSON array, no other text. Example format:
[{"severity":"high","category":"Liability","clause":"Section 5.2","issue":"Unlimited liability exposure","redline":"Cap liability at 12 months of fees paid"}]`;

export async function analyzeContract(
  apiKey: string,
  fileId: string,
): Promise<ContractRisk[]> {
  const res = await apiRequest(apiKey, "/chat/completions?wait=0", {
    method: "POST",
    headers: { "Content-Type": "application/json" },
    body: JSON.stringify({
      message: ANALYSIS_PROMPT,
      file_ids: [fileId],
    }),
  });
  const job: JobResponse<ChatResult> = await res.json();
  if (job.status === "failed") {
    throw new Error(job.error?.message ?? "Analysis failed");
  }
  return waitForAnalysis(apiKey, job.job_id);
}

async function waitForAnalysis(
  apiKey: string,
  jobId: string,
): Promise<ContractRisk[]> {
  for (let i = 0; i < 90; i++) {
    await new Promise((r) => setTimeout(r, 2000));
    const res = await apiRequest(apiKey, `/jobs/${jobId}`);
    const job: JobResponse<ChatResult> = await res.json();
    if (job.status === "succeeded" && job.result) {
      return parseRisks(job.result.result);
    }
    if (job.status === "failed") {
      throw new Error(job.error?.message ?? "Analysis failed");
    }
  }
  throw new Error("Timed out waiting for analysis");
}

function parseRisks(text: string): ContractRisk[] {
  const jsonMatch = text.match(/\[[\s\S]*\]/);
  if (!jsonMatch) throw new Error("Could not parse risk analysis response");
  return JSON.parse(jsonMatch[0]);
}
That’s the whole API layer. Three exported functions: validateApiKey(key), uploadFile(key, file), and analyzeContract(key, fileId).
3

App shell: header and footer

Now we start building src/App.tsx. This first pass just sets up the header (with the API key input), an empty main area, and a footer:
src/App.tsx
import { useCallback, useEffect, useState } from "react";
import { Document, Page, pdfjs } from "react-pdf";
import "react-pdf/dist/Page/AnnotationLayer.css";
import "react-pdf/dist/Page/TextLayer.css";
import { validateApiKey, uploadFile, analyzeContract } from "./api";
import type { ContractRisk } from "./api";

pdfjs.GlobalWorkerOptions.workerSrc = `https://unpkg.com/pdfjs-dist@${pdfjs.version}/build/pdf.worker.min.mjs`;

function App() {
  const [apiKey, setApiKey] = useState(
    () => localStorage.getItem("gcai_api_key") ?? "",
  );
  const [keyValid, setKeyValid] = useState<boolean | null>(null);
  const [keyChecking, setKeyChecking] = useState(false);

  const checkKey = useCallback(async (key: string) => {
    if (!key.trim()) {
      setKeyValid(null);
      return;
    }
    setKeyChecking(true);
    const valid = await validateApiKey(key.trim());
    setKeyValid(valid);
    setKeyChecking(false);
    if (valid) {
      localStorage.setItem("gcai_api_key", key.trim());
    }
  }, []);

  useEffect(() => {
    if (apiKey) checkKey(apiKey);
  }, []);

  function handleKeyChange(e: React.ChangeEvent<HTMLInputElement>) {
    setApiKey(e.target.value);
    setKeyValid(null);
  }

  return (
    <div className="flex min-h-screen flex-col bg-surface">
      <header className="border-b border-border bg-card px-6 py-3">
        <div className="mx-auto flex max-w-3xl items-center justify-between gap-4">
          <h1 className="shrink-0 text-base font-semibold text-ink">
            Contract Risk Heatmap
          </h1>
          <form
            onSubmit={(e) => { e.preventDefault(); checkKey(apiKey); }}
            className="flex items-center gap-2"
          >
            <div className="relative">
              <input
                type="password"
                value={apiKey}
                onChange={handleKeyChange}
                onBlur={() => checkKey(apiKey)}
                placeholder="Paste your GC AI API key"
                className="w-56 rounded border border-border bg-surface px-3 py-1.5 pr-8 font-mono text-xs text-ink placeholder:text-ink-muted focus:border-accent focus:ring-1 focus:ring-accent focus:outline-none"
              />
              <span className="absolute top-1/2 right-2.5 -translate-y-1/2">
                {keyChecking && (
                  <span className="block size-3 animate-spin rounded-full border border-border border-t-accent" />
                )}
                {!keyChecking && keyValid === true && (
                  <span className="text-xs text-success">&#10003;</span>
                )}
                {!keyChecking && keyValid === false && (
                  <span className="text-xs text-error">&#10007;</span>
                )}
              </span>
            </div>
            <a
              href="https://app.gc.ai/settings/api"
              target="_blank"
              rel="noopener noreferrer"
              className="whitespace-nowrap text-xs text-ink-muted hover:text-accent"
            >
              Get a key
            </a>
          </form>
        </div>
      </header>

      <main className="mx-auto flex w-full max-w-3xl flex-1 flex-col items-center px-6 py-8">
        {/* We'll fill this in over the next steps */}
      </main>

      <footer className="border-t border-border px-6 py-3 text-center text-xs text-ink-muted">
        Powered by the{" "}
        <a
          href="https://docs.gc.ai/api-reference/introduction"
          target="_blank"
          rel="noopener noreferrer"
          className="text-accent hover:underline"
        >
          GC AI API
        </a>
      </footer>
    </div>
  );
}

export default App;
The key validates on blur and on page load (if one was saved to localStorage from a previous session). A green checkmark or red X shows up inline so you know right away whether the key is good.
App header showing Contract Risk Heatmap title, API key input with green checkmark, and file upload drop zone
4

File upload

Add a FileUpload component above the App function. It supports both drag-and-drop and click-to-browse:
src/App.tsx (above App)
function FileUpload({
  onFileSelected,
  disabled,
}: {
  onFileSelected: (file: File) => void;
  disabled: boolean;
}) {
  const [dragOver, setDragOver] = useState(false);

  const handleDrop = useCallback(
    (e: React.DragEvent) => {
      e.preventDefault();
      setDragOver(false);
      const file = e.dataTransfer.files[0];
      if (file) onFileSelected(file);
    },
    [onFileSelected],
  );

  const handleChange = useCallback(
    (e: React.ChangeEvent<HTMLInputElement>) => {
      const file = e.target.files?.[0];
      if (file) onFileSelected(file);
    },
    [onFileSelected],
  );

  return (
    <div
      onDragOver={(e) => { e.preventDefault(); setDragOver(true); }}
      onDragLeave={() => setDragOver(false)}
      onDrop={handleDrop}
      className={`flex w-full max-w-md flex-col items-center rounded-lg border-2 border-dashed p-12 transition-colors ${
        dragOver ? "border-accent bg-accent/5" : "border-border"
      } ${disabled ? "pointer-events-none opacity-50" : "cursor-pointer hover:border-ink-muted"}`}
      onClick={() => {
        if (!disabled) document.getElementById("file-input")?.click();
      }}
    >
      <svg className="mb-3 size-8 text-ink-muted" fill="none" viewBox="0 0 24 24" stroke="currentColor" strokeWidth={1.5}>
        <path strokeLinecap="round" strokeLinejoin="round" d="M19.5 14.25v-2.625a3.375 3.375 0 0 0-3.375-3.375h-1.5A1.125 1.125 0 0 1 13.5 7.125v-1.5a3.375 3.375 0 0 0-3.375-3.375H8.25m6.75 12-3-3m0 0-3 3m3-3v6m-1.5-15H5.625c-.621 0-1.125.504-1.125 1.125v17.25c0 .621.504 1.125 1.125 1.125h12.75c.621 0 1.125-.504 1.125-1.125V11.25a9 9 0 0 0-9-9Z" />
      </svg>
      <p className="text-sm text-ink-secondary">
        Drop a contract here, or{" "}
        <span className="font-medium text-accent">browse</span>
      </p>
      <p className="mt-1 text-xs text-ink-muted">PDF</p>
      <input id="file-input" type="file" accept=".pdf" onChange={handleChange} className="hidden" />
    </div>
  );
}
5

Document preview

Add a DocumentPreview component that renders the uploaded PDF using react-pdf. We use this instead of a native iframe embed so the preview works in sandboxed environments like Replit:
src/App.tsx (above App)
function DocumentPreview({ file }: { file: File }) {
  const [numPages, setNumPages] = useState(0);

  return (
    <div className="w-full overflow-hidden rounded-lg border border-border-light bg-card shadow-sm">
      <div className="flex items-center justify-between border-b border-border-light px-4 py-2">
        <span className="text-sm text-ink-secondary">{file.name}</span>
        <span className="text-xs text-ink-muted">
          {(file.size / 1024).toFixed(0)} KB
        </span>
      </div>
      <div className="max-h-96 overflow-y-auto">
        <Document file={file} onLoadSuccess={({ numPages: n }) => setNumPages(n)}>
          {Array.from({ length: numPages }, (_, i) => (
            <Page key={i + 1} pageNumber={i + 1} width={700} />
          ))}
        </Document>
      </div>
    </div>
  );
}
This renders from the browser’s local File object, not from anything returned by the API. The preview shows up the moment the user drops a file, even while the upload is still running.
6

Risk heatmap

Add the RiskHeatmap component that renders the analysis results. Each risk gets a card with a colored left border for severity, a category badge, a clause reference, and a suggested redline:
src/App.tsx (above App)
const severityStyles = {
  high: {
    border: "border-l-severity-high",
    badge: "bg-severity-high-bg text-severity-high",
    label: "High",
  },
  medium: {
    border: "border-l-severity-medium",
    badge: "bg-severity-medium-bg text-severity-medium",
    label: "Medium",
  },
  low: {
    border: "border-l-severity-low",
    badge: "bg-severity-low-bg text-severity-low",
    label: "Low",
  },
};

function SeveritySummary({ risks }: { risks: ContractRisk[] }) {
  const counts = { high: 0, medium: 0, low: 0 };
  for (const r of risks) counts[r.severity]++;

  return (
    <div className="flex gap-2 text-xs">
      {(["high", "medium", "low"] as const).map((level) =>
        counts[level] > 0 ? (
          <span
            key={level}
            className={`rounded px-1.5 py-0.5 font-medium ${severityStyles[level].badge}`}
          >
            {counts[level]} {severityStyles[level].label}
          </span>
        ) : null,
      )}
    </div>
  );
}

function RiskHeatmap({
  risks,
  fileName,
}: {
  risks: ContractRisk[];
  fileName: string;
}) {
  const sorted = [...risks].sort((a, b) => {
    const order = { high: 0, medium: 1, low: 2 };
    return order[a.severity] - order[b.severity];
  });

  return (
    <div className="w-full">
      <div className="mb-4 flex items-center justify-between">
        <div>
          <h2 className="text-sm font-semibold text-ink">Identified Risks</h2>
          <p className="text-xs text-ink-muted">{fileName}</p>
        </div>
        <SeveritySummary risks={risks} />
      </div>

      <div className="space-y-2">
        {sorted.map((risk, i) => {
          const style = severityStyles[risk.severity];
          return (
            <div
              key={i}
              className={`rounded-lg border border-border-light border-l-[3px] bg-card p-4 shadow-sm ${style.border}`}
            >
              <div className="flex items-center justify-between">
                <span className={`shrink-0 rounded px-1.5 py-0.5 text-[11px] font-medium ${style.badge}`}>
                  {risk.category}
                </span>
                <span className="shrink-0 rounded bg-surface px-1.5 py-0.5 text-[11px] font-medium text-ink-muted">
                  {risk.clause}
                </span>
              </div>
              <p className="mt-1.5 text-sm font-medium leading-snug text-ink">
                {risk.issue}
              </p>
              <p className="mt-1 text-[13px] leading-relaxed text-ink-secondary">
                {risk.redline}
              </p>
            </div>
          );
        })}
      </div>
    </div>
  );
}
Risks are sorted high to low. The SeveritySummary at the top acts as a legend, with colored count badges that match the left-border colors on the cards below.
7

Wire it up

The last piece is the state machine and the conditional rendering that wires everything together.Define the status type and status messages above the App function:
src/App.tsx (above App)
type Status =
  | { step: "idle" }
  | { step: "uploading"; fileName: string; file: File }
  | { step: "analyzing"; fileName: string; file: File }
  | { step: "done"; fileName: string; file: File; risks: ContractRisk[] }
  | { step: "error"; message: string };

const statusMessages: Record<string, string> = {
  uploading: "Uploading contract...",
  analyzing: "Analyzing risks, this may take a minute...",
};
Each variant of Status carries only the data the UI needs for that state. TypeScript narrows the type in each rendering branch, so you can’t accidentally access risks while still uploading.Add the state and handler inside App:
const [status, setStatus] = useState<Status>({ step: "idle" });

async function handleFile(file: File) {
  const key = apiKey.trim();
  try {
    setStatus({ step: "uploading", fileName: file.name, file });
    const uploaded = await uploadFile(key, file);

    setStatus({ step: "analyzing", fileName: file.name, file });
    const risks = await analyzeContract(key, uploaded.id);

    setStatus({ step: "done", fileName: file.name, file, risks });
  } catch (err) {
    setStatus({
      step: "error",
      message: err instanceof Error ? err.message : "Something went wrong",
    });
  }
}

function reset() {
  setStatus({ step: "idle" });
}

const isWorking =
  status.step === "uploading" || status.step === "analyzing";
const isReady = keyValid === true && !isWorking && status.step !== "done";
Finally, fill in the <main> element:
<main className="mx-auto flex w-full max-w-3xl flex-1 flex-col items-center px-6 py-8">
  {keyValid === false && (
    <div className="mb-6 w-full rounded border border-error/20 bg-error-bg px-4 py-2 text-sm text-error">
      Invalid API key. Check your key in{" "}
      <a href="https://app.gc.ai/settings/api" target="_blank" rel="noopener noreferrer" className="underline">
        Settings &rarr; API
      </a>
    </div>
  )}

  {!keyValid && !keyChecking && status.step === "idle" && (
    <div className="flex flex-1 flex-col items-center justify-center">
      <div className="rounded-lg border border-dashed border-border p-16 text-center">
        <p className="text-sm text-ink-secondary">
          Enter your GC AI API key above to get started
        </p>
        <p className="mt-1 text-xs text-ink-muted">
          Upload a contract and get a structured risk analysis
        </p>
      </div>
    </div>
  )}

  {isReady && status.step === "idle" && (
    <div className="flex w-full flex-1 flex-col items-center justify-center">
      <FileUpload onFileSelected={handleFile} disabled={false} />
    </div>
  )}

  {(isWorking || status.step === "done") && (
    <div className="flex w-full flex-col gap-6">
      {"file" in status && <DocumentPreview file={status.file} />}

      {isWorking && (
        <div className="flex flex-col items-center gap-3 py-8">
          <div className="size-8 animate-spin rounded-full border-2 border-border border-t-accent" />
          <p className="text-sm text-ink-secondary">
            {statusMessages[status.step]}
          </p>
        </div>
      )}

      {status.step === "done" && (
        <>
          <RiskHeatmap risks={status.risks} fileName={status.fileName} />
          <div className="flex justify-center pb-4">
            <button
              onClick={reset}
              className="rounded border border-border bg-card px-4 py-2 text-sm text-ink-secondary shadow-sm hover:bg-surface"
            >
              Analyze another contract
            </button>
          </div>
        </>
      )}
    </div>
  )}

  {status.step === "error" && (
    <div className="flex flex-1 flex-col items-center justify-center gap-3">
      <div className="rounded border border-error/20 bg-error-bg px-4 py-3 text-sm text-error">
        {status.message}
      </div>
      <button onClick={reset} className="text-sm text-accent hover:underline">
        Try again
      </button>
    </div>
  )}
</main>
The UI shows one thing at a time based on the current status: a prompt to enter a key, the file upload zone, a spinner, or the results. The
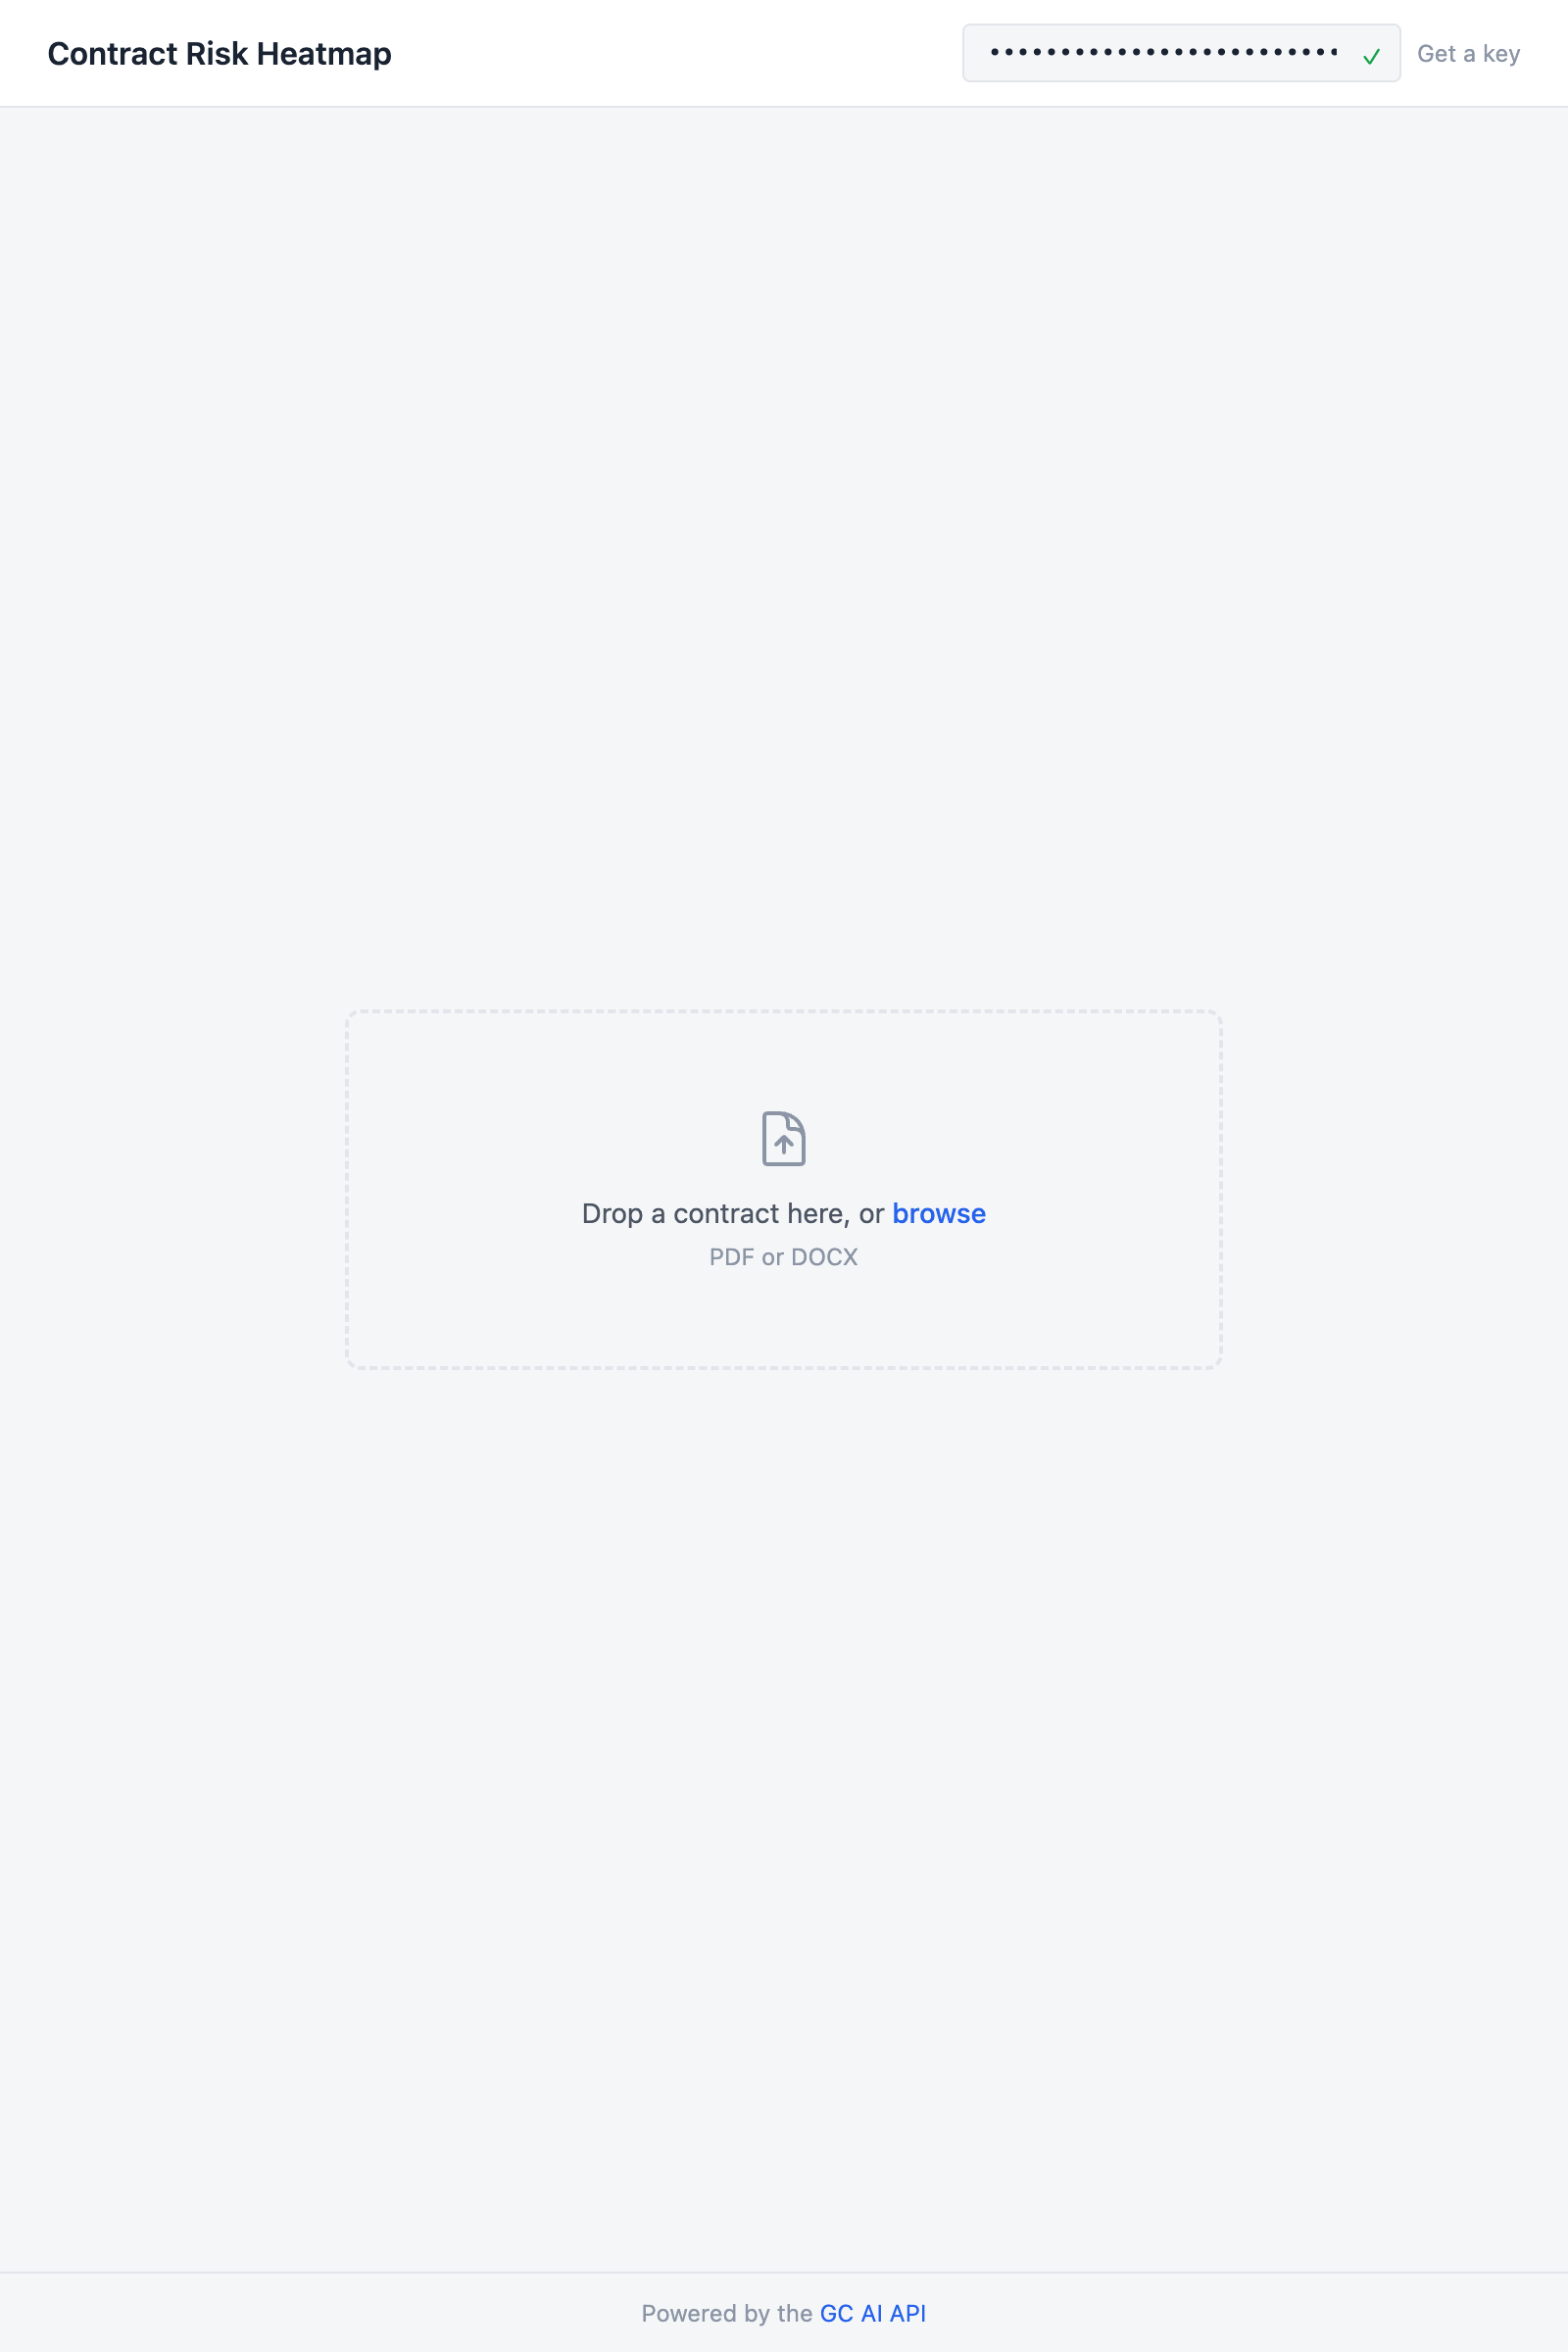
 DocumentPreview stays mounted across the uploading/analyzing/done transitions so it doesn’t flash.Run npm run dev, paste your API key, and drop a contract PDF. You should see the risk heatmap appear after about 30-60 seconds.
Finished app showing a PDF preview of the uploaded contract and risk heatmap cards sorted by severity

Source code

GitHub

Clone the repo and run locally

Replit

Run it in the browser